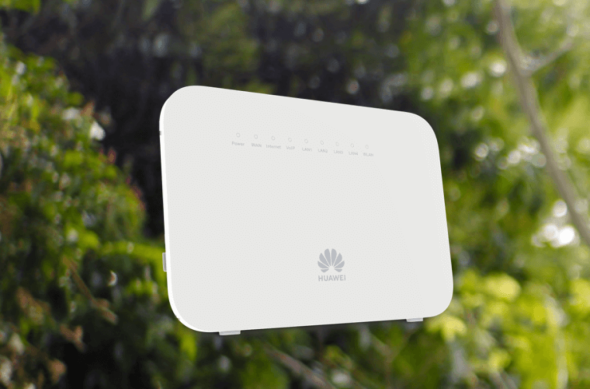
With most ADSL and VDSL broadband connections, you can install the supplied modem yourself.
You can also install a fibre broadband modem yourself, provided that fibre is already connected at your house, and you already have an Optical Network Terminal (ONT) installed.
If you signed up for Wireless Broadband, follow the Wireless Broadband instructions.
Your modem will be delivered to your address and it includes:
Got all of the above? Great! You’re ready to install the modem.
You can also install a fibre broadband modem yourself, provided that fibre is already connected at your house, and you already have an Optical Network Terminal (ONT) installed.
If you signed up for Wireless Broadband, follow the Wireless Broadband instructions.
Your modem will be delivered to your address and it includes:
- The One NZ modem/router
- A power supply
- A LAN cable
- A DSL and phone line cable
- A WiFi sticker
- A DSL filter
Got all of the above? Great! You’re ready to install the modem.
Important things to know
If you need a connection and wiring installation
A technician visit may be required (charges may apply). In this case, we'll send you a wireless modem and book a date and time with you for a technician to come over and complete the installation. The installation may take about 1-2 hours.
The technician will:
A technician visit may be required (charges may apply). In this case, we'll send you a wireless modem and book a date and time with you for a technician to come over and complete the installation. The installation may take about 1-2 hours.
The technician will:
- Talk to you about the available options and the best place for the new jack point. This is usually close to where most of your internet devices are, such as the TV cabinet, or the study room
- Install a new jack point for the modem to plug into in your home
- Test the sync rate prior to and after the installation is completed. If the new sync rate is lower than ADSL, the connection will be converted back to ADSL. If this happens, no VDSL-related charges or contract commitments will apply
Identify your phone socket type
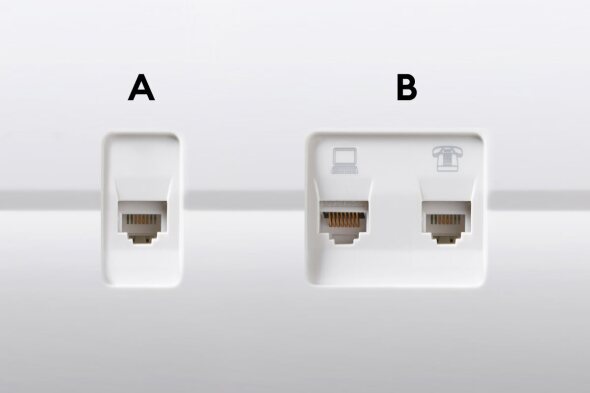
ADSL and VDSL only
Socket type A
- One port only
- If you have not had a technician visit to install broadband, then it is a standard socket and needs a broadband filter connected to work properly with your modem
Socket type B
- Separate phone and DSL ports or a dedicated DSL port
- No broadband filter needed - it's a pre-filtered socket
Plugging in your modem
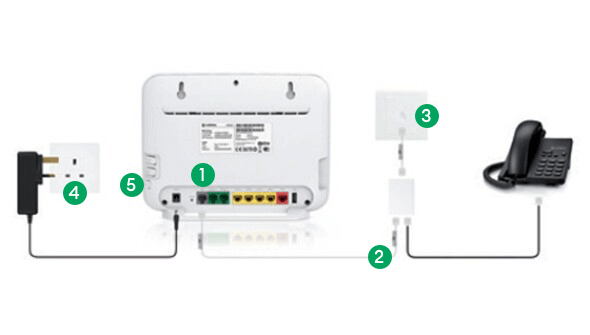
- Connect one end of the DSL cable to the grey DSL port on the modem
- Connect to the other end of the DSL cable to the port on the broadband filter socket marked DSL
- Plug the end of the filter's LINE cable into your master socket on the wall
- Connect the power supply into a main socket and the power cable into the modem power supply socket
- Press the On/Off button on the side of the modem and wait for the WAN light to turn to solid green (requires service to have been activated by One NZ)
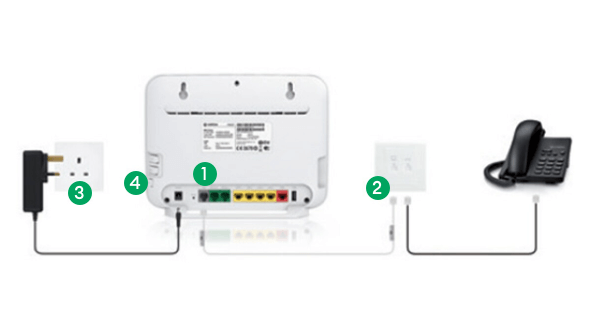
- Connect one end of the DSL cable to the grey DSL port on the modem
- Connect the other end of the DSL cable to the dedicated, labelled broadband socket
- Connect the power supply into a main socket and the power cable into the modem power supply socket
- Press the On/Off button on the side of the modem and wait for the WAN light to turn to solid green
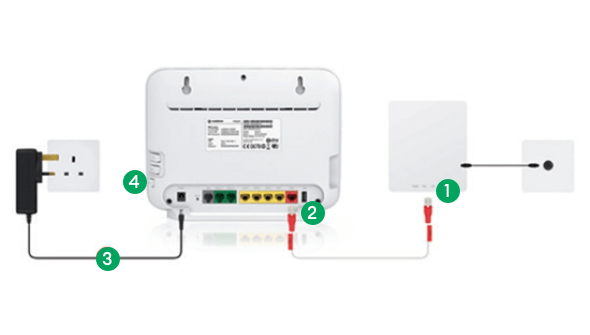
- Connect one end of the Ethernet cable to the Grey GE1 port on the Fibre ONT
- Connect the other end of the Ethernet cable to the Red WAN port on the modem
- Connect the power supply into a main socket and the power cable into the modem power supply socket
- Press the On/Off button on the side of the modem and wait for the WAN light to turn to solid green